
 ENG
ENG  ITA
ITA Why is photorealistic rendering important?
First of all we need to answer a question.
Why is photorealistic rendering important?
One of the most common ways of communication in today's modern world is through images. Just think of the various social networking sites, we communicate with each other almost exclusively through pictures. This is also mostly the case in interior design. Often our clients prefer to look at a visual image rather than a drawing or a section. A good render can help you visualise the interior design, answer many questions/doubts: "Will my client like the lamps? Will they light the room well enough? And the accessories? What will he think of them?" These are questions that can be answered positively with a well-done render image.
So why is photorealistic rendering important? Because we can capture the heart of our client with a sophisticated visual image. The interior will feel like their own.
Let's look at these two pictures taken in the same room. In the first picture (Image 1), the materials are not set up yet, I didn't use render styles, excessive use of sun and artificial lights, poor perspective, few test renders and short render times.
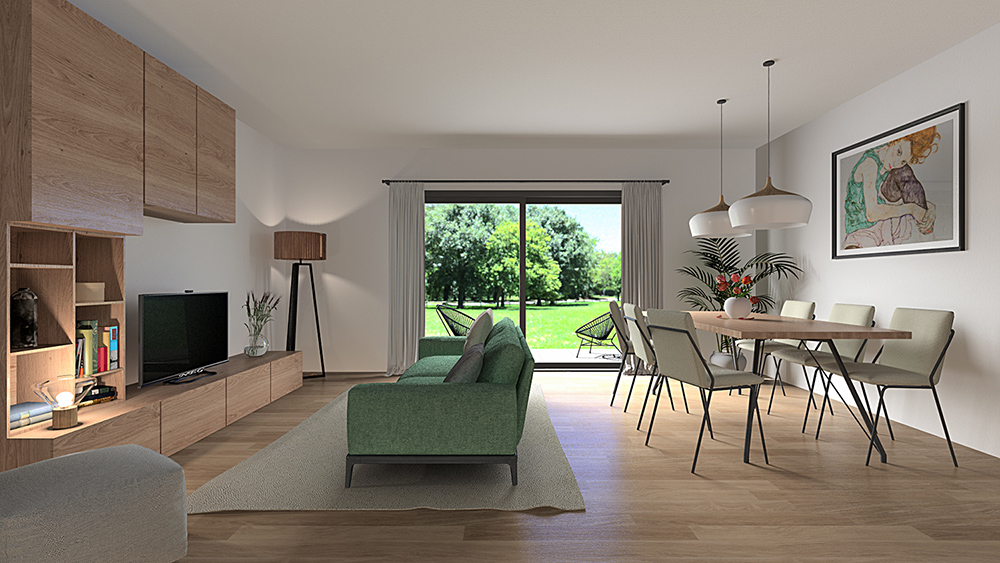
The second image (Image 2) took more time, many test renders and a longer render time to create, but if we put the two images in front of our client, which one would have the greater effect?
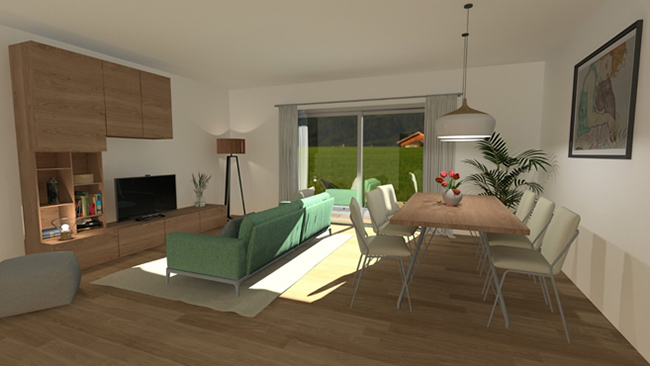
Image 1

Image 2
To achieve the quality of image 2 in our renderings, we need to learn to create photo-realistic images. You have to learn to work with highlights and shadows, know the physical properties of the materials, find the ideal point of view and build up a photorealistic image that looks realistic, step by step.
In this tutorial, I will show you the main steps of rendering using a simple living room example. From setting the viewpoint to creating the final render, we'll go into detail about what values to add in this project and what to look out for to avoid the main mistakes. The result will be the image shown above.
The project was done with ARCHLine.XP 2021 and you can find on my website and on my Youtube channel a video showing the workflow of this tutorial.