
 ENG
ENG  ITA
ITA Material Options - Render Styles
Before we get into this not at all easy subject, I would like to give you some general advice on choosing the right texture and setting the material.
Always use high quality textures. These can be found in the ARCHLine.XP Tutorial or downloaded from various websites, but make sure you choose images with a medium resolution, about 400x400 pixels, but this depends on the actual size of the texture. For example, if it's a poster covering a whole wall, choose a higher resolution image.
It is important that the textures are seamless. If they are not, they should be converted into an area pattern either in ARCHLine.XP or in an image editing program, if possible.
If you want a really good rendering, not only assign the right render styles to the objects, but also take the time to fine tune the parameters of the materials while checking the settings with test renders.
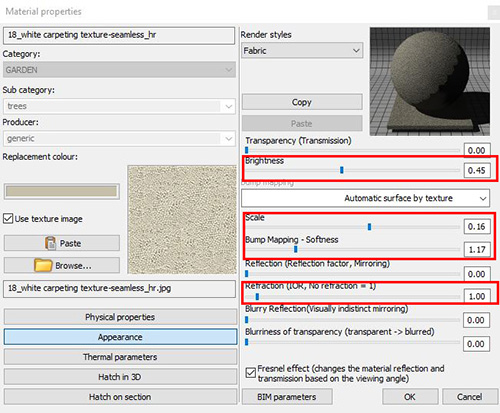
During test renders, it is possible that the colour of some materials, e.g. wood, may become too dominant and affect the surroundings, e.g. walls (Image 1), so it is recommended to desaturate them somewhat in an external program such as Photoshop, Gimp, Lightroom, etc. (Image 2).

Image 1

Image 2
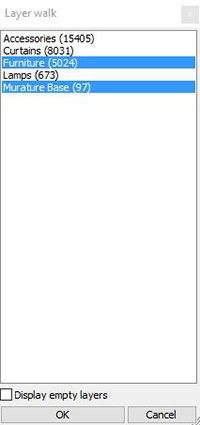
In the first phase, only the architectural model is displayed, which is located on the "Murature Base" layer in the example project. Switch off all other layers. Rebuild the 3D model.
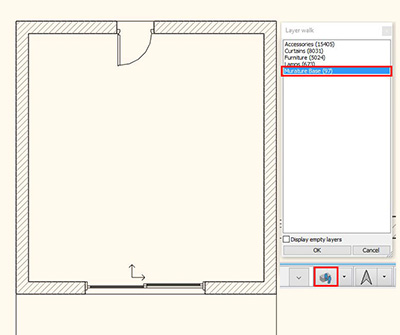
Layer walk window
Use the drag and drop method to assign appropriate render styles to these main elements. Wall for the wall, parquet for the parquet, metal for the metal door and glass for the glass.
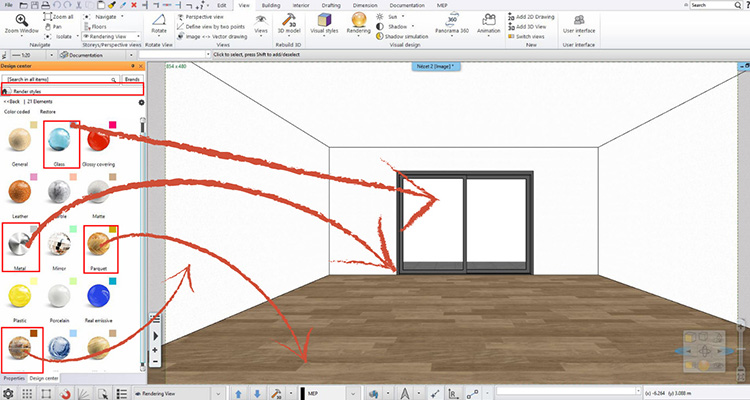
Render styles
Before fine-tuning the material settings, let's create the first standalone test render.
In the Standalone Render window, I set a low resolution, best quality, but low light source sampling:
Resolution: 854x480
Render presets: I03
Light sampling rate: 24
Sunlight: clear daylight
Sun intensity scaling: 50
Background: Panorama - Custom panorama: HDRI noon_grass_4k
Panorama direction: 25. Brightness: 25
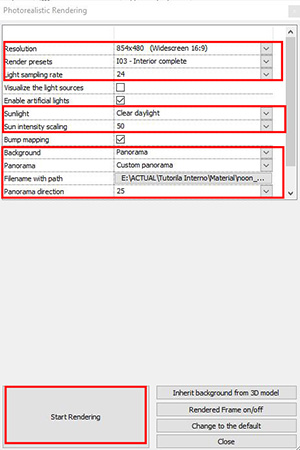
Standalone rendering window

Render image without modification of materials
Depending on this, fine-tune the materials as shown in the diagrams below:
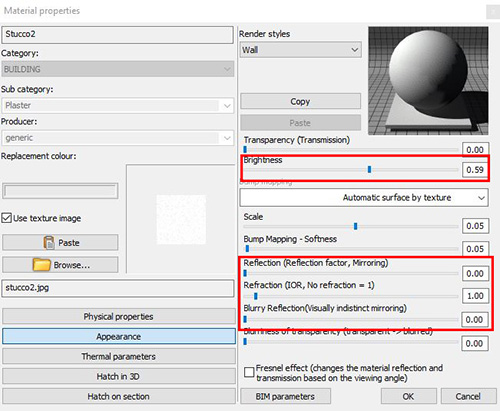
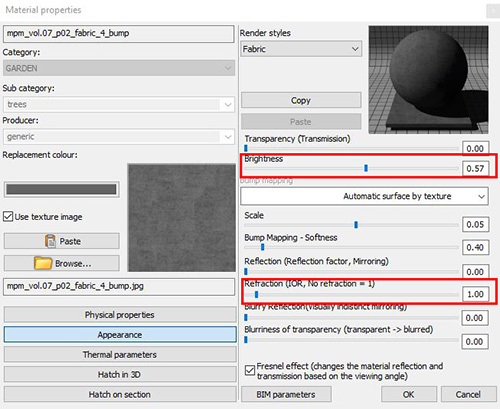
Setting the wall material:
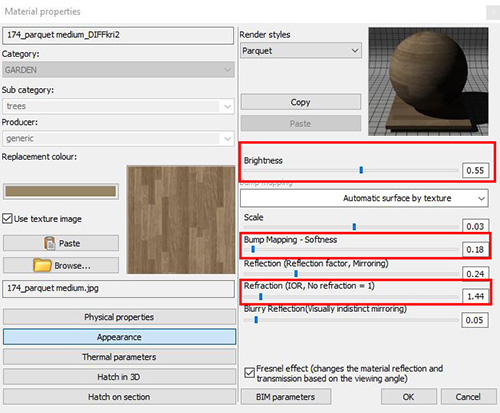
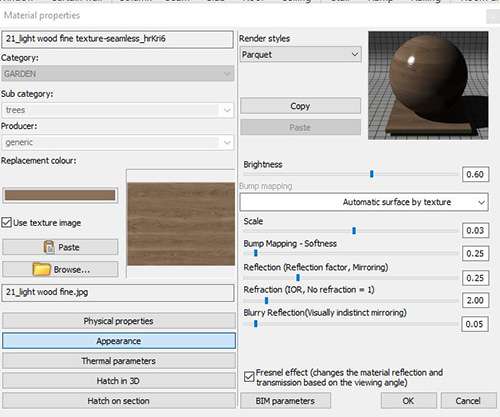
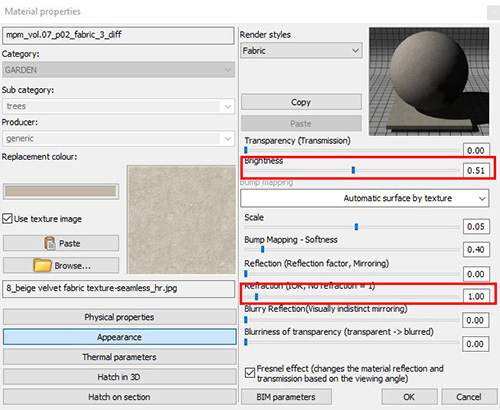
Setting the parquet material:
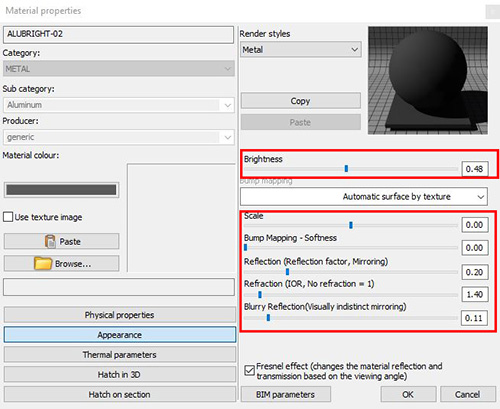
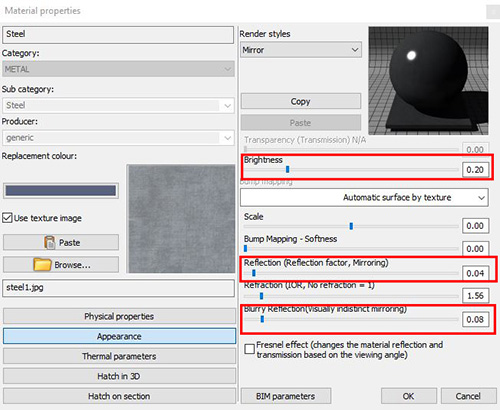
Setting the door frame material:
Setting the door glass material:
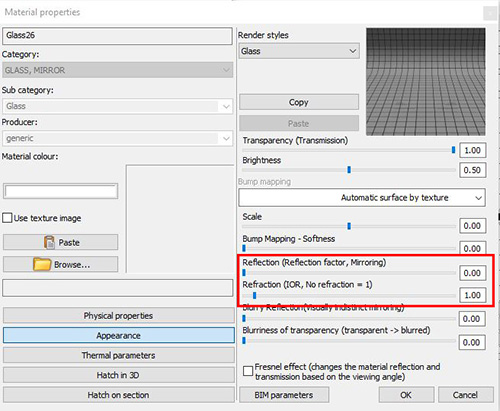
In the Glass property window, as you can see, I've completely removed the reflection, as if the glass wasn't there. Of course, if you want, you can set low values for refraction and reflection. However, keep in mind that in this scene the intensity of the sunlight is strong and the background is bright, so you shouldn't see any reflection of the interior on the glass.
Windowglass with reflections
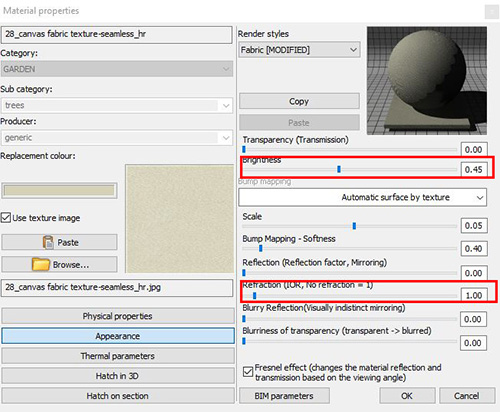
Terrace flooring:
This will be the surface that gets the most sun. To keep it from being over-burned, I've assigned it a matte style and set the brightness.

Prepare the next test render with the values already set.

Result with material changes
It's OK if it looks dark, we'll correct it at the end of the workflow.
In phase 2, we deal with the furniture.
Let's turn on the "Furniture" layer where the furniture can be found and rebuild the 3D model.
We also assign render styles to the new elements.
Flooring style for the bookcase.
Textiles for the sofa, cushions, chair fabric and carpet.
Mirror style for metal legs
It's worth taking a close-up test render of each piece of furniture to see any imperfections at a low resolution.
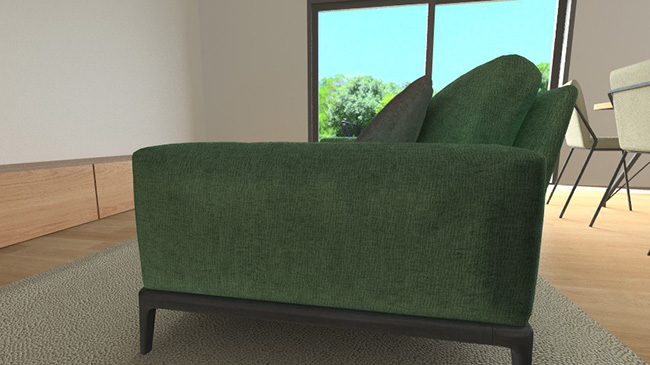
Framing close to the object to check for any errors
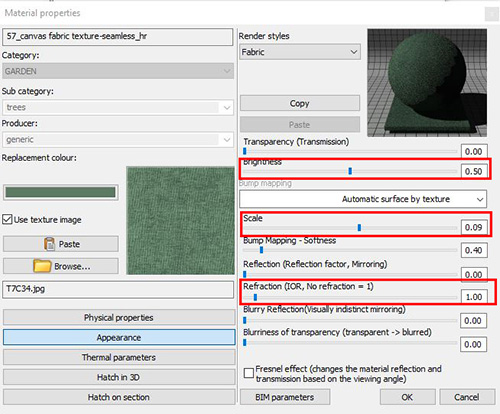
Sofa upholstery material setting:
Bookcase material setting:
Grey cushion material setting:
Brown cushion material setting:
Metal legs of sofa, table, chairs:
Chair upholstery material setting:
Carpet material setting:
Create a new test render.
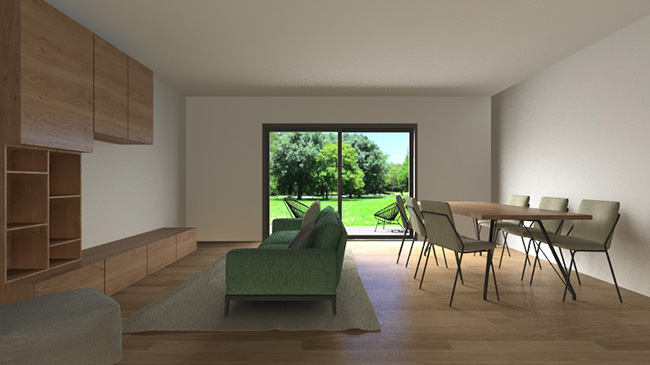
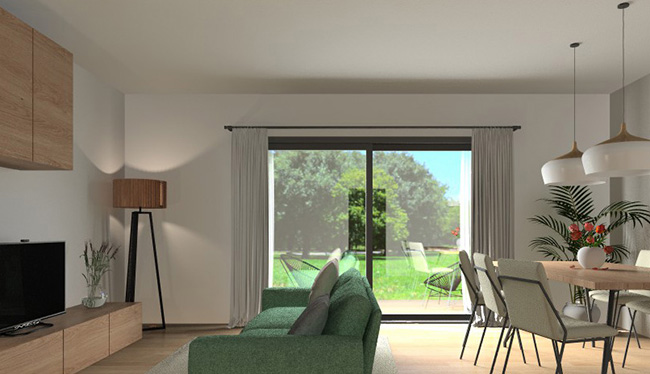
Render image with furniture
The result is evolving, let's keep working on Setting artificial lights.